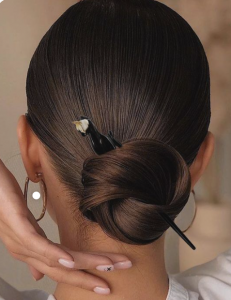
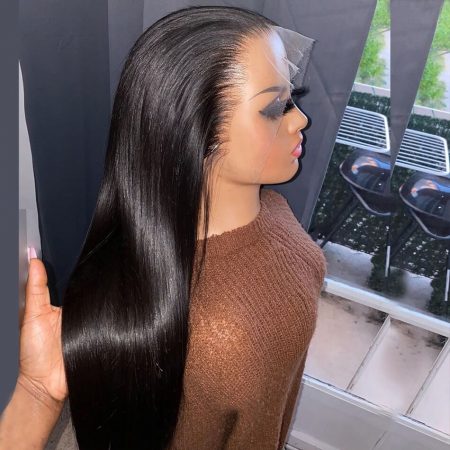
Wearing a wig can be a fantastic way to switch up your hairstyle or conceal hair loss. Among the various wig options available, the 360 lace wig has gained significant popularity due to its versatility and natural appearance. Designed with a lace cap that covers the entire perimeter of the head, a 360 lace wig offers maximum styling flexibility, allowing for various updos and parting options.
If you’re a beginner looking to install a 360 lace wig, this comprehensive guide is here to assist you. In this article, we will take you through a step-by-step process, covering everything from preparing your hair to securing the wig properly. By the end, you’ll have all the knowledge and confidence needed to flawlessly install your 360 lace wig and achieve a stunning, natural look.
Preparing Your Hair.
Before you begin the process of installing a 360 lace wig, it’s essential to prepare your natural hair properly. This step ensures that your hair is clean, protected, and provides a smooth base for the wig to be secured. Here are the key steps to follow when preparing your hair:
Washing and Conditioning.
Start by washing your hair using a gentle shampoo and conditioner. This step removes any dirt, oils, or product buildup from your hair, ensuring a clean foundation. Rinse your hair thoroughly to remove all traces of shampoo and conditioner.
Braiding or Cornrowing.
Next, consider braiding or cornrowing your natural hair. This technique helps to keep your hair flat and minimizes bulkiness under the wig. You can choose between various braiding patterns, such as cornrows, flat twists, or individual braids, depending on your preference and hair length. Make sure the braids are secure but not too tight, as this can cause discomfort.
Applying a Wig Cap.
After braiding, it’s advisable to wear a wig cap. A wig cap is a breathable, lightweight stocking cap that fits snugly over your braided or cornrowed hair. It acts as a protective barrier between your natural hair and the wig, preventing friction and potential damage. Ensure that the wig cap is securely in place, covering all your hair and leaving no loose ends.
Prepping the Wig.
Once you have prepared your natural hair, it’s time to prep the 360 lace wig itself. This involves customizing the wig to fit your head shape, cutting the lace, and styling the hairline. Here are the key steps to follow when prepping the wig:
Cutting the Lace.
Carefully examine the wig and identify the lace portion that needs to be cut. Using a pair of sharp scissors, cut along the hairline, following the shape of your forehead. Take your time and make small, precise cuts to avoid cutting too much lace. It’s recommended to leave a small amount of lace beyond the hairline for a more natural appearance.
Customizing the Hairline.
To create a more realistic hairline, you can customize the wig by plucking a few hairs along the hairline. Gently pluck the hairs from the lace using tweezers, creating a gradual and natural-looking density. Be cautious and avoid plucking too many hairs as it can make the hairline appear thin. Test the wig on your head periodically to ensure that the hairline matches your natural hairline.
Plucking the Hairline.
In addition to plucking, you can also consider using a razor or small scissors to shape the hairline further. Carefully trim the baby hairs at the front of the wig to achieve a softer, more natural look. You can create slight irregularities in the hairline by trimming certain strands shorter than others. This technique mimics the appearance of natural hair growth and adds to the realism of the wig.
Bleaching the Knots (Optional)
If desired, you can bleach the knots on the lace to make them less visible. Knots are tiny hair strands that are tied to the lace to secure the hair in place. By applying a diluted bleach solution to the knots, you can lighten their color and make them blend more seamlessly with your scalp. However, be cautious when bleaching as overdoing it can damage the lace or the hair strands.
Applying Adhesive or Glue.
Applying adhesive or glue is an important step in securing your 360 lace wig and ensuring it stays in place. There are various types of adhesives available, such as wig glue, adhesive tapes, and adhesive gels. It’s important to choose the right adhesive for your needs and preferences. Here’s a step-by-step guide on how to apply adhesive or glue for your 360 lace wig:
Choosing the Right Adhesive.
Select an adhesive that suits your needs and provides a strong hold. Consider factors like skin sensitivity, duration of wear, and ease of application. Wig glue is a common choice, but if you have sensitive skin, you may opt for adhesive tapes or gels, which are less likely to cause irritation.
Applying Adhesive to the Skin.
Start by cleaning your hairline and skin using a mild cleanser or alcohol-based solution to remove any oils or residue. Apply a thin layer of scalp protector or skin-friendly adhesive primer along your hairline to create a barrier and protect your skin. Then, using a small brush or cotton swab, apply a thin layer of adhesive along your hairline, ensuring an even and smooth application.
Applying Adhesive to the Wig.
Turn your 360 lace wig inside out and apply a thin layer of adhesive to the lace. Use a small brush or sponge to spread the adhesive evenly, making sure to cover the entire perimeter of the lace. Avoid applying adhesive to the hair strands, as this can cause clumping and affect the wig’s appearance. Allow the adhesive on both the skin and the wig to become tacky or slightly dry before proceeding to the next step.
Waiting for Adhesive to Dry.
Once the adhesive on both the skin and the wig is tacky, carefully place the wig on your head. Gently press the lace onto the adhesive, starting from the front and moving towards the back. Use your fingers or a clean, soft brush to smooth out any air bubbles or wrinkles in the lace. Avoid pulling or stretching the lace, as it can cause damage. Allow the adhesive to completely dry and set, following the manufacturer’s instructions.
Wig Installation.
Wig installation is a crucial step in achieving a secure and natural-looking 360 lace wig. This process involves placing the wig on your head, adjusting it for a proper fit, and securing it in place. Here’s a step-by-step guide to help you with the wig installation process:
Placing the Wig on Your Head.
Start by aligning the front of the wig with your natural hairline. Gently place the wig on your head, ensuring that the back of the wig is properly positioned. The wig should sit snugly on your head, with the lace portion covering your entire hairline. Use a mirror or ask someone for assistance to ensure that the wig is centered and aligned correctly.
Adjusting the Wig.
Once the wig is in place, adjust it to achieve a comfortable and secure fit. Use your fingers to carefully adjust the wig’s position, ensuring that the lace lies flat against your skin. You can gently pull the wig forward or backward to find the most natural placement. Additionally, adjust the ear tabs on the wig to align with your natural ears for a more realistic appearance.
Securing the Wig with Adhesive.
If you’re using adhesive to secure the wig, press the lace firmly onto the dried adhesive on your scalp. Start from the front and gradually work your way to the back, ensuring that the lace adheres evenly. Gently press down on the lace using your fingers or the back of a comb to ensure a strong bond. Take your time during this step to ensure the wig is securely attached.
Securing the Wig with Elastic Bands.
Alternatively, you can use elastic bands to secure the wig in place. Some 360 lace wigs come with adjustable straps or elastic bands at the back. Adjust the straps to tighten or loosen the wig to achieve a comfortable fit. Ensure that the wig feels secure but not too tight, as this can cause discomfort. You can also use bobby pins or hair clips to secure the wig’s sides or back if necessary.
Final Adjustments.
After securing the wig, make any final adjustments to ensure a natural and seamless look. Use a comb or brush to blend your natural hair with the wig hair, creating a seamless transition. Style the wig as desired, such as parting it in the middle or on the side, and make any necessary trims to achieve your desired length or style. Take your time to ensure the wig looks and feels comfortable and natural.

Styling the Wig.
Styling the wig is where you can truly unleash your creativity and personalize your look with the 360 lace wig. From cutting and shaping the wig to blending it with your natural hair, here are the essential steps for styling your wig:
Cutting and Shaping the Wig.
To achieve your desired hairstyle, you may need to trim or shape the wig. Use sharp hairdressing scissors to carefully cut the wig’s hair, following your desired style. Remember to make small, gradual cuts to avoid removing too much hair at once. Trim the ends to achieve a neat and polished look. Take your time and periodically check the wig in the mirror to ensure you’re achieving the desired length and style.
Blending Your Natural Hair.
If you have some natural hair exposed at the front or sides, it’s important to blend it seamlessly with the wig. Use a comb or brush to gently blend your natural hair with the wig’s hair, creating a smooth and natural transition. You can also use styling products like gels or sprays to help blend and control any flyaways or frizz.
Creating a Natural Part.
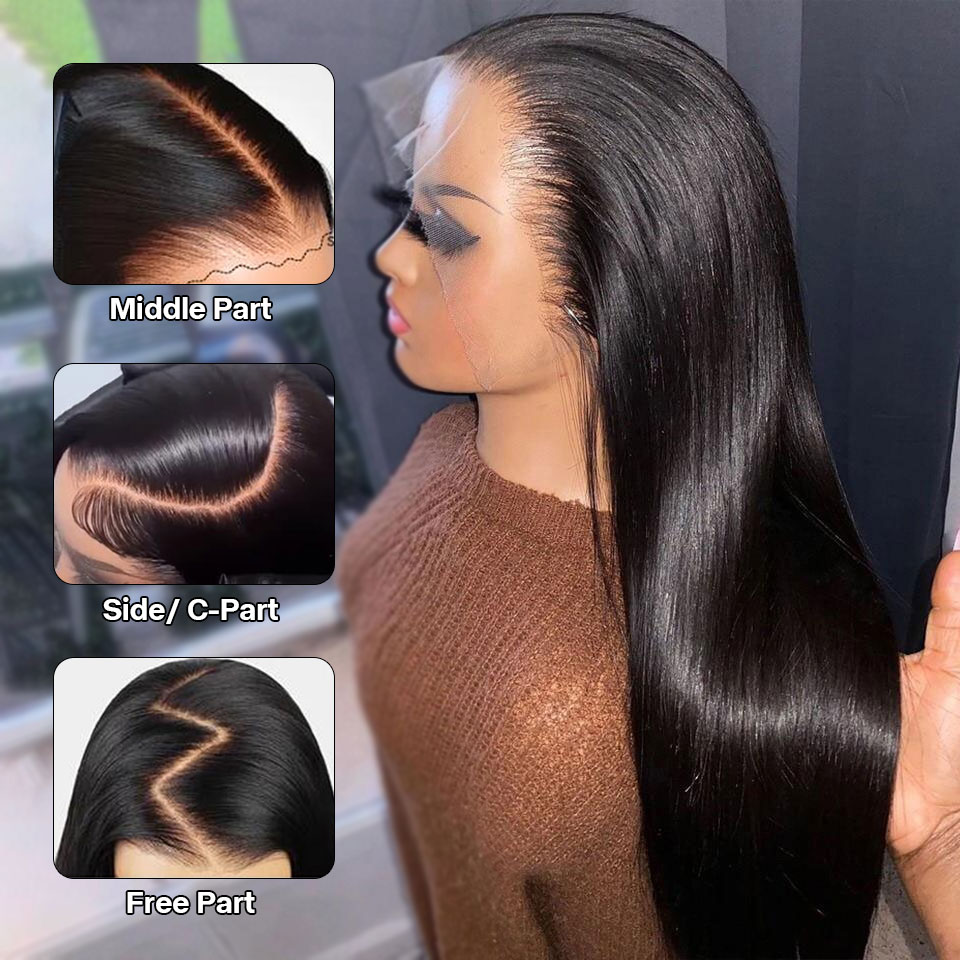
The beauty of a 360 lace wig is that you can create a natural-looking parting wherever you like. Use a rat-tail comb or your fingers to create a part along the lace, starting from the front and moving backward. Experiment with different parting styles, such as a middle part, side part, or a zigzag part, to find the one that suits you best. Adjust the part until it looks natural and aligns with your facial features.
Styling Tips and Techniques.
Now comes the fun part of styling your wig! You can curl, straighten, or even add accessories to create different looks. When using heat styling tools like curling irons or flat irons, ensure you set them to the appropriate temperature to prevent damaging the wig’s hair. It’s also a good idea to use heat protectant sprays or serums to minimize heat damage.
Consider experimenting with different hairstyles, such as updos, ponytails, braids, or half-up, half-down styles. You can use hairpins, hair ties, or other styling accessories to create various looks. Play around with different techniques and find what works best for you.
Remember to be gentle when styling the wig and avoid excessive pulling or tugging, as this can damage the lace or the wig’s hair. Take care of your wig by following proper maintenance and styling practices.
Caring for Your 360 Lace Wig.
Caring for your 360 lace wig is essential to maintain its quality, longevity, and natural appearance. Proper maintenance ensures that your wig stays in excellent condition and continues to look its best. Here are the key steps to follow when caring for your 360 lace wig:
Daily Maintenance.
Gently brush your wig daily with a wig brush or a wide-toothed comb to prevent tangles and keep the hair looking smooth. Start at the ends and work your way up to the roots, being careful not to pull too hard on the hair strands. Avoid using regular brushes or combs as they can cause damage to the wig’s delicate lace and hair.
Washing and Conditioning.
Regularly wash your wig to remove any dirt, oils, or product buildup. Fill a basin or sink with lukewarm water and add a small amount of wig shampoo. Gently immerse the wig in the water and swirl it around without rubbing or twisting the hair. Rinse thoroughly with clean water and apply a wig conditioner, focusing on the ends. Rinse again and gently pat the wig dry with a towel, avoiding any rubbing or wringing.
Styling and Heat Protection.
When styling with heat tools, such as curling irons or straighteners, use a heat protectant spray or serum to shield the hair from heat damage. Set the heat tools to a moderate temperature and apply the heat in short intervals, avoiding prolonged exposure to prevent hair damage. Remember, excessive heat can cause the wig’s hair to become dry and brittle.
Storing the Wig.
When not in use, store your 360 lace wig properly to maintain its shape and prevent tangling. Gently detangle the hair and brush it out. Place the wig on a wig stand or a wig head to retain its shape and allow it to air out. Keep the wig away from direct sunlight, heat sources, or damp environments that could potentially damage the wig’s fibers or lace. If desired, you can cover the wig with a hair net or a silk scarf to protect it from dust.
Conclusion.
Installing a 360 lace wig may seem daunting at first, but with the right guidance, anyone can achieve a flawless and natural-looking result. By following the step-by-step instructions provided in this guide, beginners can confidently navigate the installation process. Remember to take your time, practice patience, and don’t hesitate to seek professional assistance if needed.
Once you’ve mastered the installation technique, you’ll have the freedom to experiment with different hairstyles and transform your look effortlessly. Don’t forget to maintain your 360 lace wig properly to ensure its longevity and keep it looking as good as new.
Now that you have all the tools and knowledge required, it’s time to embark on your journey to flawless 360 lace wig installations. Get ready to enjoy the versatility and beauty of this remarkable wig option!


